Décor For The Whole Family- Try Decoupage
Imani shares a great family activity for you to enjoy.
As the Holiday season fast approaches, children will be going on holiday break and spending more time at home. I cannot think of a better way to bring kids into the design process than sharing in a DIY project.
Decoupage
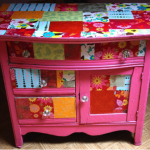
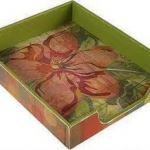
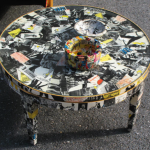
Decoupage is a design technique that involves cutting out multiple pieces of paper and applying them to a surface to create a new aesthetic. With decoupage it is very simple to create distinct pieces in your home. It is a great DIY project because it can be used to revive old furniture in your home. Also, because of its simplicity decoupage is ideal to do with children. Children will be able to choose their own images and colors, thus making it all the more personal.
Here’s what you’ll need (credit hgtv)
Materials and Tools:
Object or surface to decorate
Decorative images or paper
White glue
Sharp scissors or craft knife
Brushes
Acrylic varnish (polyurethane or Mod Podge)
small sponge
Optional:
Paints, Pastels, Color pencils or India ink (for coloring black-and-white images)
Gouache (to mix with last coat of varnish for a tinted finish)
Aging Varnish (to give an aged or crackled finish)
Gilded Powder (to mix with last coat of varnish for a metallic finish)
Measuring Tape
Spray fixative (to prevent images from smearing if you’ve colored them)
Steel wool (to reduce the shine of high-gloss polyurethane)
Paste wax (to buff up the shine)
Steps:
1. Prepare the surface of the object, and decide what you want to decoupage onto the surface.
2. Use a photocopier to enlarge, reduce and/or copy images.
3. Use scissors or a craft knife to cut out the images.
4. Thin the white glue with a small amount of water. Apply glue to the back of the image with your fingers or a small brush.
5. Adhere the images to the object and let them dry.
6. Remove the excess adhesive with a damp sponge. Let dry.
7. Apply several coats of varnish. You can brush on polyurethane of Mod Podge or use spray-on polyurethane. Let dry between coats. If you don’t like too much shine on your decoupage, use satin polyurethane and rough it up a bit with steel wool. To buff a finished surface, use a little paste wax.
Tips and More Ideas:
• Use a sharp craft knife when cutting complex images such as birds and flowers.
• Decoupaging glass votives with holiday tissue paper has long been an easy Christmas craft. Consider decoupaging fall votives, as well.
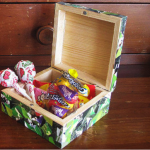
• Stamps look great decoupaged onto small boxes. You can also use foreign money, or buy clip-art books, which are full of designs and images that are copyright-free.
• Give dime-store mirrors a makeover with decoupaged paper and stickers.
• Use silk and real leaves to create templates from which you can cut tissue-paper leaves. Layer the leaves for a great effect.
• Cut images from colorful wrapping paper to dress up inexpensive wastebaskets.
• Rescue an old coat rack from the trash. Paint it black, decorate it with designs from a clip-art book and varnish it. You’re old coat rack can become a new mug holder in no time.
Ricci’s comments
Are you ready to roll up your sleeves? Take advantage of some of these great tips during family down time
Inspiring Creativity,
Ricci

Decorating or Refreshing Your Home?
Download our COMPLIMENTARY checklist and get access to our 7 Step Process to Decorate in Stages, Stay on Budget & Reduce Overwhelm.
Thank you for requesting our checklist head over to your email to get instructions on how to access it now!
We hate spam as much as you do we promise not to share any of your information...



Thanks to my father who stated to me concerning this
web site, this website is really amazing.