Sundays with Ydp: Wallpaper removal in 7 easy steps

I have hated the wallpaper in our basement, from the moment that I first laid eyes on it. My husband has somehow talked me into keeping it, because in his words, “it’s grown on me, and it’s not that bad”.
which essentially means, he doesn’t want to spend money to change it.
I’m not sure how I finally won the battle, but when he was finally on board, I set the wheels in motion.
I called one of my favorite contractors (Jack), to assist me with the project.
BEFORE THE WALLPAPER REMOVAL the basement was screaming help me help me! Does this wallpaper make me look dated? And of course the answer was a resounding YES!

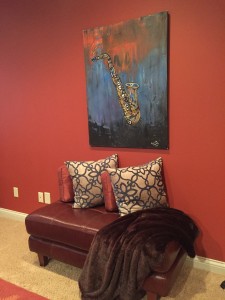
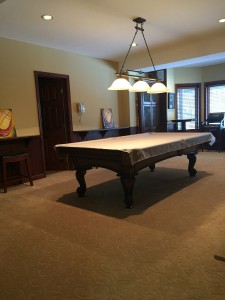
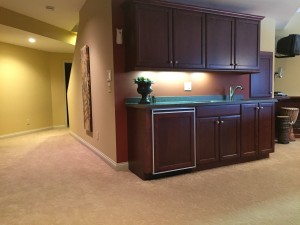
AFTER THE WALLPAPER REMOVAL the space feels cozy, in harmony and perfect.
If you’re wondering how to make wallpaper removal less tedious, read the steps below
- Get a steamer I’ve tried stripping products and a combination of fabric softener and water. I even tried scoring the walls, which actually adds more time and repair work to the project. A good steamer is best. Try not to rush the process, let the steam do it’s job.
- Wipe the walls down with warm water after the paper is removed.
- Sand the walls first using an extension pole and then hand sand them to get heavy glue areas smooth. If you’re planning on painting the walls afterwards, priming them is crucial.
- Prime your walls with an an oil based primer and ask for a 50% tint – this will create a uniform surface and prepare your walls to receive your new paint color. tinting it 50% saves time and helps you work smarter not harder. If you can, crack a few windows, as oil based primers smell really strong.
- Apply your first coat of paint
- Re sand areas that swell – you’ll find that this may happen occasionally, if so, do a quick hand sanding and re roll the area.
- Apply your second coat of paint for beautiful, smooth walls. And I’ll bet there will be no evidence that wallpaper ever existed.
I learned a lot since my last wallpaper removal project. You might remember it HERE
Hey, Did you know that today is National compliment day?
I know right? I didn’t either. Sometimes I wonder who actually comes up with these special days and why.
So I’m using today to give a shout out to Jack, who is a contractor that does terrific work.
He’s a pretty busy guy who’s close to retirement, but finds the time to squeeze my projects in when needed.
Thanks to Jack, I’m loving my new basement walls. Jack this compliment goes out to you….YOU ARE A SUPER STAR !!!
Happy compliment day friends! Who can you give a compliment to today and what are your favorite tips for wallpaper removal?
If you’re interested in having a one on one consult, I’d love to meet you.
Let’s connect via email at rjackson@yourdesignpartner.com or simply contact me at (217) 722 – 4806
Thanks for stopping by!
Inspiring Creativity,
Ricci

Decorating or Refreshing Your Home?
Download our COMPLIMENTARY checklist and get access to our 7 Step Process to Decorate in Stages, Stay on Budget & Reduce Overwhelm.
Thank you for requesting our checklist head over to your email to get instructions on how to access it now!
We hate spam as much as you do we promise not to share any of your information...


[…] a quick drying mud for minor drywall repairs and fine sandpaper. Unlike my larger job here, I didn’t need a tinted oil based primer. I used two coats of Sherwin Williams cashmere […]